Friday, June 3, 2011
GnT - Creating a 3D Section View in Revit
Whether a building is complex or fairly simple, sometimes typical 2-dimensional views just don’t display what you really need to see. Using a 3D view of a section through a building gives a better view of just what is going on inside the building. Most 3-dimensional software packages have methods to create 3D section views, and you should take advantage of those when beneficial to you.
One method of creating a 3D section in Revit is by using an existing section as the determining location of the 3D section view. This process is:
1. Create a 3D view by clicking on the Default 3D View command on the Create panel of the View tab.
2. Right-click on the {3D} view in the Project Browser and select Duplicate View -> Duplicate from the context-sensitive menu to create an identical view. This will create a new 3D view named Copy of {3D}.
3. Make sure that the newly created 3D view is active.
4. Right-click on the ViewCube and select Orient to View -> Sections, then select the desired section view from the list of sections already placed in the model. (This will make the 3D view look like it is a section view, but will still be considered a 3D view.)
5. Hold down the Shift key at the same time as the middle mouse button to orbit the view to display the 3D section as desired.
6. The 3D section location can be adjusted by either repeating steps 3, 4 and 5, or by adjusting the location of the section line in a plan view, elevation view, or another section view to display the section cut as desired in the 3D view.
7. Renaming the new 3D view is a good idea. Right-click on the newly created 3D view named Copy of {3D} in the Project Browser and select Rename from the context-sensitive menu. Name the 3D view with the same name as the section view that was just used with the 3D view.
Wednesday, June 1, 2011
GnT - Resetting User Interface
You would like to reset the Autodesk Revit Structure 2011 user interface back to the out-of-the-box version and remove any customization that has been applied.
Solution
Have us do it for you:
Download and run the following script on your computer:
autodesk_revit_structure_ui_reset_2011.vbs (vbs - 6Kb)
Warning! This script may delete a file on your computer. It also removes a Windows Registry key. Do not use it without consulting your system administrator first.
Do It Yourself:
To reset the ribbon and Quick Access Toolbar:
Rename or delete the UIState.dat file located in the Autodesk Revit Structure 2011 folder, which can be found in one of the following locations, depending on your operating system:
Windows XP
%USERPROFILE%\Local Settings\Application Data\Autodesk\Revit\Autodesk Revit Structure 2011
Windows Vista/ Windows 7
%LOCALAPPDATA%\Autodesk\Revit\Autodesk Revit Structure 2011
To reset your Project Browser to the default location:
Using the Windows Registry editor, rename the following registry key:
HKEY_CURRENT_USER\Software\Autodesk\Revit\Autodesk Revit Structure 2011\Components\Panels
RST - Exercise: Explore the Revit Structure User Interface
Before reading this, you should read the Lesson: Exploring the User Interface first.
Now, here we go .......
In this exercise, you explore the different parts of the user interface.
Your firm is standardizing on Revit Structure. You need to learn the user interface before you start work on a project.
You do the following:
- Explore views of a model.
- Explore model properties using the interface.

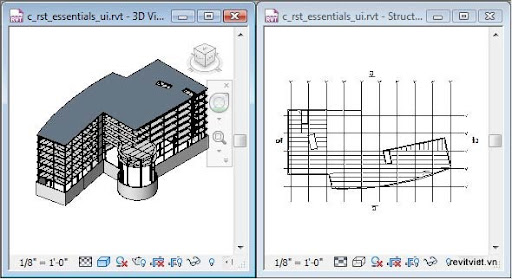
The completed exercise
RST - Lesson: Exploring the User Interface
This lesson describes how to use the different parts of the Revit Structure user interface. You begin the lesson by learning about the main user interface. Then, you learn about the ribbon framework and some recommended practices for using the user interface. The lesson concludes with an exercise on exploring the user interface.
Revit Structure provides a user friendly interface where tools and options are available on the ribbon. In addition, context menus provide quick access to commonly used tools. The status bar provides information and tips that assist you while you work. Familiarity with the user interface helps you work w ith the software more efficiently.

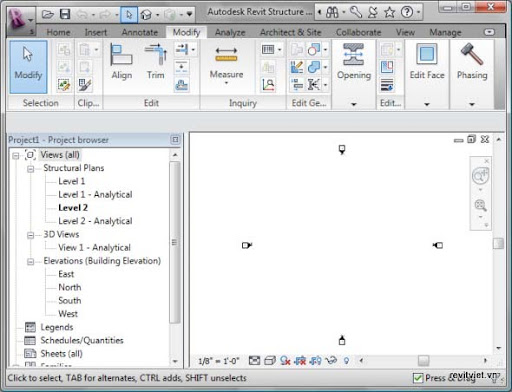
Revit Structure user interface with a project file open
Objectives
After completing this lesson, you will be able to:- Identify the different parts of the Revit Structure user interface.
- Describe the Revit Structure ribbon framework.
- State the recommended practices for using the user interface.
- Explore the Revit Structure user interface.
Monday, May 30, 2011
RST - Chapter 1: Building Information Modeling
Building information modeling (BIM) is an integrated workflow built on coordinated, reliable information about a project from design through construction and into operations. The Revit platform is purpose-built software for building information modeling.
Building information modeling (BIM) makes sustainable design practices easier by enabling architects and engineers to more accurately visualize, simulate, and analyze building performance earlier in the design process.

Building information modeling (BIM) makes sustainable design practices easier by enabling architects and engineers to more accurately visualize, simulate, and analyze building performance earlier in the design process.
Chapter Objective
In this chapter, you will learn about building information modeling methodology.Lesson: Building Information Modeling for
Structural Engineering
This lesson describes the building information modeling (BIM) process for structural engineering. Applying building information modeling results in better drawings, shorter timelines, and improved productivity. It offers an opportunity for building industry professionals to design, construct, and operate buildings of higher quality at a lower cost and at reduced environmental impact.
GnT Save all families in a project to RFAs and folders AUTOMATICALLY
Let's say you have a project with heaps of families in it, and you want to save them to individual files. There is an API add on that does exactly this. How do you get it and use it?
First of all, download this file
Now:
This is a ZIP file, so unzip the file.
Browse in the contents to:
\c24\ExampleApplication\ExampleApplication\bin\Debug\
Copy everything from this folder to:
C:\Revit Projects\
Copy the two .addin files from the \c24\ folder to the correct location as shown below:
* For a specific user:
o For Windows XP - C:\Documents and Settings\\Application Data\Autodesk\Revit\Addins\2011
o For Vista/Windows 7 - C:\Users\\AppData\Roaming\Autodesk\Revit\Addins\2011
* For all users:
o For Windows XP - C:\Documents and Settings\All Users\Application Data\Autodesk\Revit\Addins\2011
o For Vista/Windows 7 - C:\ProgramData\Autodesk\Revit\Addins\2011
Refer to this post at The Building Coder for more information.
Restart Revit 2011
Now, on the Add-Ins ribbon, there will be a new section for the Revit Family Export Utility:
When you run this with a Project open, it will prompt you for a directory, and then it will save all the families from the current Project to .rfa family files, and it will put them into appropriate directories (by Category) for you!
This is a very cool tool - thanks to Don Rudder for his great chapter in the book, and for this excellent API demonstration.
Consider some ways you could use this:
Load a bunch of families into a project and get this tool to sort them into appropriate folders for you.
You have an RVT but you do not have the RFA files for families loaded into the RVT - use this tool to get them all out quickly.
Transfer all RFAs from one RVT to another by saving them out and then loading them all in at once.
First of all, download this file
Now:
This is a ZIP file, so unzip the file.
Browse in the contents to:
\c24\ExampleApplication\ExampleApplication\bin\Debug\
Copy everything from this folder to:
C:\Revit Projects\
Copy the two .addin files from the \c24\ folder to the correct location as shown below:
* For a specific user:
o For Windows XP - C:\Documents and Settings\\Application Data\Autodesk\Revit\Addins\2011
o For Vista/Windows 7 - C:\Users\\AppData\Roaming\Autodesk\Revit\Addins\2011
* For all users:
o For Windows XP - C:\Documents and Settings\All Users\Application Data\Autodesk\Revit\Addins\2011
o For Vista/Windows 7 - C:\ProgramData\Autodesk\Revit\Addins\2011
Refer to this post at The Building Coder for more information.
Restart Revit 2011
Now, on the Add-Ins ribbon, there will be a new section for the Revit Family Export Utility:
This is a very cool tool - thanks to Don Rudder for his great chapter in the book, and for this excellent API demonstration.
Consider some ways you could use this:
Load a bunch of families into a project and get this tool to sort them into appropriate folders for you.
You have an RVT but you do not have the RFA files for families loaded into the RVT - use this tool to get them all out quickly.
Transfer all RFAs from one RVT to another by saving them out and then loading them all in at once.
GnT - Reduce Size of Revit Families
When creating Autodesk Revit families for use in Revit projects, it is very important to minimize the file size of the families so that they do not bloat the project. Reducing family size is especially important when a family will be used many times in a project, although if a family is just used once or twice, the consequences of the larger size are not too significant.
The most common way of reducing file size is to Purge Unused information from the file.
Unused Materials do not get removed when the Purge Unused function is utilized, so those need to be removed separately.
setting.
- A Category that has a deleted material assigned to it will default to not having a material assignment.
An often overlooked family file reduction method is to compact the family. This can significantly reduce the file size of the family and should always be performed before utilizing the family in a project.
- In the Save As dialog box, select the Options… button in the lower right corner of the dialog box.
- In the File Save Options dialog box, place a checkmark next to the Compact File option. Pick the OK button, then pick the Save button to save the file and perform the file compaction.
The above steps are in addition to keeping your Revit family streamlined and not including excess information.
The most common way of reducing file size is to Purge Unused information from the file.
- This function is available from the Manage tab and the Settings panel.
- If you select the Check All button, then select the OK button, most of the unused information in the file will be removed.
- If you select the Check None button, then you can select only the items that you desire to remove from the file.
- Unused nested family types will be removed, so if a nested family has 5 different types and 2 of those types are used in the file, then just the 3 unused types will be removed.
Unused Materials do not get removed when the Purge Unused function is utilized, so those need to be removed separately.
- Materials are accessed from the Manage tab and the Settings panel.
- In the Materials dialog box, select the unwanted material in the left side, right-click and select Delete from the context-sensitive menu.
- Note that it is possible to delete a material that is actually in use. Be careful.
- A Category that has a deleted material assigned to it will default to not having a material assignment.
An often overlooked family file reduction method is to compact the family. This can significantly reduce the file size of the family and should always be performed before utilizing the family in a project.
From the Application Menu (the big purple “R”), select Save As -> Family.
- In the File Save Options dialog box, place a checkmark next to the Compact File option. Pick the OK button, then pick the Save button to save the file and perform the file compaction.
This option is only available after the family has been saved as least once before.
Subscribe to:
Posts (Atom)