I n your project, you want to view the different types of structural elements and families in different views.
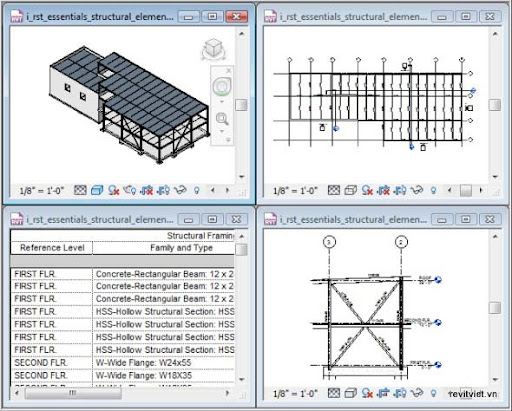
The completed exercise
Completing the Exercise
To complete the exercise, download m_rst_essentials_structural_elements.rvt, follow the steps in the onscreen exercise.1. Open i_rst_essentials_structural_elements.rvt or m_rst_essentials_structural_elements.rvt. The file opens in the default 3D view of a
building structure consisting of composite concrete floor slabs supported on steel framing and load bearing walls. Notice that only the model elements display in the 3D view. The datum elements, which are levels and grids, do not display in the 3D view.
Note: The illustrations for the metric dataset will be slightly different from those shown here.
2. Open the Elevation 2 - a view, which shows a steel brace frame consisting of wide flange beams, wide flange columns, and steel tube braces. In addition to the model elements, there are level and grid datum elements and annotation tags that belong to the view.
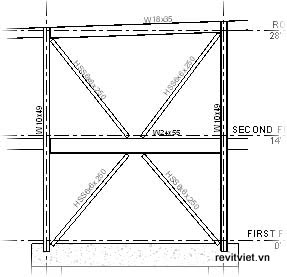
3. Select the beam below the SECOND FLR. level.

4. Click Modify Structural Framing tab > Element panel > Type Selector drop-down.
5. Select W-Wide Flange W12x26 (M_W-Wide Flange W310X38.7) from the Type Selector drop-down. Notice that the depth of the beam changes, and also that the ends of the braces adjust with the depth of the beam.
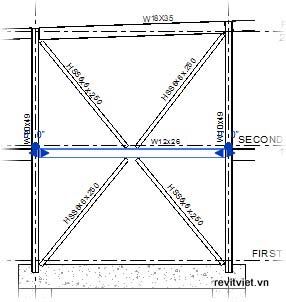
6. On the Element panel, select Type Properties from the Element Properties drop-down.
7. In the Type Properties dialog box:
- Notice that the W12x26 (W310X38.7) beam belongs to the W-Wide Flange (M_W-Wide Flange) family.
- Click Cancel.
9. Open the Type Properties dialog box again.
10. In the Type Properties dialog box:
- Notice that the W10x49 (W250x115) column belongs to the W-Wide Flange- Column (M_W-Wide Flange-Column) family.
- Click Cancel.
11. In the view window, clear the selection from the column.
12. Open the SECOND FLR. structural plan view.
13. In the view window, notice the stick representation of the steel framing. This is because the view is set to the Coarse detail view.
14. On the View Control Bar, change the Detail Level to Medium. The beam extrusions representing the actual flange widths of the members are now visible.
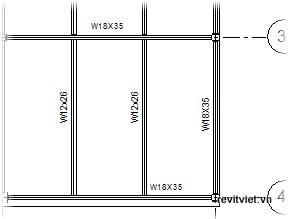
Note: Changing the Detail Level can be useful for checking whether the flange widths accommodate the slab edges or architectural wall assemblies at shaft openings and at the perimeter of the building.
15. Open the Structural Framing Schedule view. This schedule view lists every instance of structural framing elements currently in the model. You can assign parameters common to structural framing elements to display by using the properties of the schedule view. In this case, Reference Level, Family and Type, Length, and Structural Usage are displayed.
Note: Schedule views are bidirectional, similar to the other views in the Revit model. If elements are added or removed from the model, the schedule is automatically updated accordingly. Similarly, any changes made in the schedule view are propagated throughout the model.
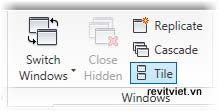
16. Click View tab > Windows panel > Tile to display the tile view.
17. Click in the default 3D view window to make it active.
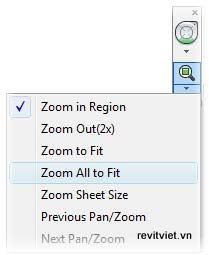
18. On the Navigation Bar, click Zoom All to Fit from the Zoom options drop-down.
Notice that each view is zoomed to fit its tiled window.
Note: If the Zoom All to Fit option is already selected in the Zoom options drop-down, click the Zoom icon to activate Zoom All to Fit.
19. Close the file without saving changes.


what is the *.rvt.zip file's password
ReplyDeletePassword is: revitviet.vn
ReplyDeletecan you upload all training Files
Delete