

You want to explore and create views of a structural model so that you can properly visualize the structural design. You use the Steering Wheel to view the structural model and then explore the different views in the Project Browser. Finally, you create multiple plan views of the structural model by using the options for duplicating views.
You do the following:
- Explore views.
- Create multiple plan views.
The completed exercise
Completing the Exercise
To complete the exercise, download c_rst_essentials_viewing.rvt follow the steps in this book or in the onscreen exercise.
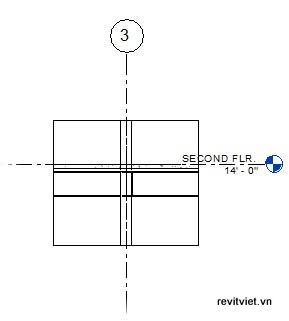
1. Open c_rst_essentials_viewing.rvt. The file opens in the SECOND FLR. view.
2. Open the default 3D view.
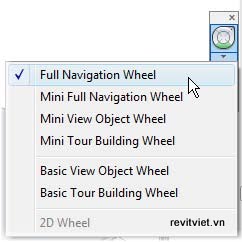
3. On the Navigation Bar, select Full Navigation Wheel from the SteeringWheels drop-down to navigate and view the building model in the view window using the Zoom, Orbit, and Pan tools.
Note: If the Full Navigation Wheel is already selected in the SteeringWheels dropdown, click the Steering Wheels icon on the
Navigation Bar to display Full Navigation Wheel.
4. In the view window, move the cursor over the building model. Notice that the Steering Wheel follows the cursor.
5. In the view window:
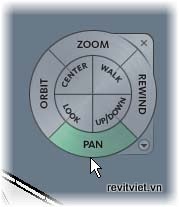
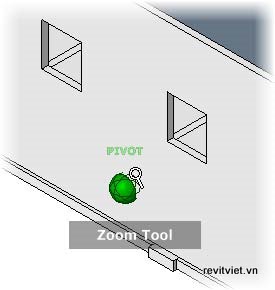
- On the Steering Wheel, click Zoom to establish the Zoom pivot point. The Zoom pivot point appears below the point where you click the Zoom tool.
- Drag the cursor up or right to enlarge the view, and down or left to shrink the view of the building model.
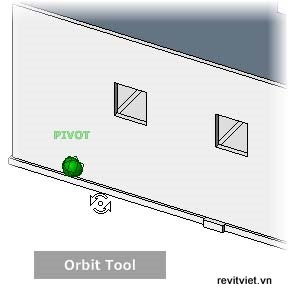
6. In the view window:
- On the Steering Wheel, click Orbit to establish the Orbit pivot point.
- Drag the cursor to spin the view.
7. On the Steering Wheel, click Pan and drag the cursor to move sideways or up and down the view of the building model to pan the view.
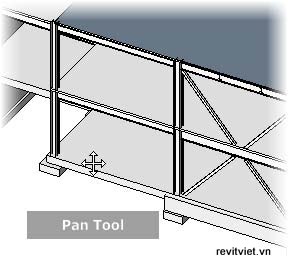
Note: Press ESC or click Modify on the Quick Access toolbar to exit the Steering Wheel.
8. Open the FIRST FLR. structural plan view.
9. Use the mouse wheel to zoom in (roll the wheel forward) and zoom out (roll the wheel backward). Notice that the position of the cursor remains fixed in the view window as you zoom in and out.
10. On the Navigation Bar, select Zoom in Region from the Zoom drop-down.
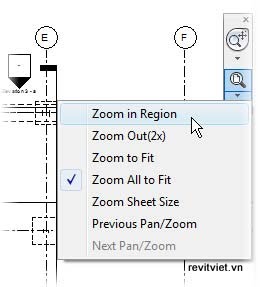
Notice that the cursor changes to the magnifying glass icon.
Note: If Zoom in Region is already selected in the Zoom drop-down, click the Zoom icon on the Navigation Bar to display the Zoom tool.
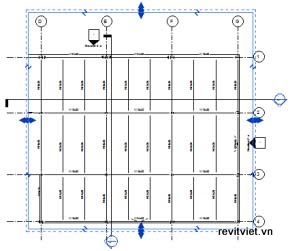
11. Zoom in to the right (east) half of the building model.
Notice the section line running vertically through the middle of the building model. This section line denotes the placement of a building section and is named Section 2.
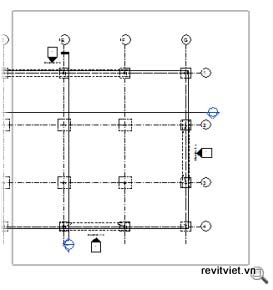
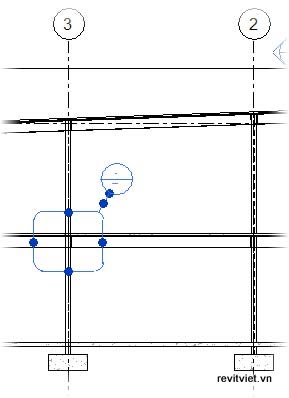
12. Select the vertical section line (Section 2), as shown.
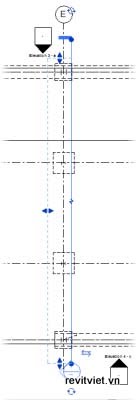
13. Right-click anywhere in the view window. Click Go to View to make Section 2 the active view.
14. In the Section 2 view, select the callout on the left side of the view. This callout is named Callout of Section 2.
15. Right-click anywhere in the view window. Click Go to View to make Callout of Section 2 the active view.
Create Multiple Plan Views
1. Create a new view without detailing. In the Project Browser, under Structural Plans:- Right-click SECOND FLR. Click Duplicate View > Duplicate to create a duplicate view. Notice that a new view named Copy of SECOND FLR. is added to the Project Browser and is now the active view. In the duplicate view, model elements are visible but the annotations are not.
- Right-click Copy of SECOND FLR. Click Rename.
- Enter SECOND FLR. - Working.
- Click OK.
a referenced architectural plan. The original SECOND FLR. view can contain the annotation and be used for documentation.
3. Create a new view with detailing. In the Project Browser, under Structural Plans:
- Right-click SECOND FLR. Click Duplicate View > Duplicate with Detailing. A new view named Copy of SECOND FLR. is again added to the Project Browser and is now the active view. Notice the annotation tags that are visible in the duplicate view.
- Rename Copy of SECOND FLR. to SECOND FLR. - Overall.
4. Create a new view as a dependent view. In the Project Browser, under Structural Plans:
- Right-click SECOND FLR. Click Duplicate View > Duplicate as a Dependent. A new view named Dependent on SECOND FLR. is added to the Project Browser and listedunder the original view. Notice that the annotation tags are visible in the duplicate view.
- Rename Dependent on SECOND FLR. to SECOND FLR. - West.
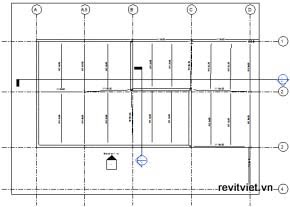
- Select the crop boundaries and resize the view to display only the portion of the plan between the grid lines A and D.
- Press ESC to clear the selection.
This view is dependent on the original SECOND FLR. view and shares the same view settings, such as scale and detail level. Annotations added to the dependent view also display in the parent view and vice versa.
6. Create another dependent view of the SECOND FLR. as SECOND FLR. - East.
7. Resize the view similar to the SECOND FLR. - West view to display only the portion of the plan between the grid lines D and G.
8. Clear the selection.
9. Open the parent view SECOND FLR.
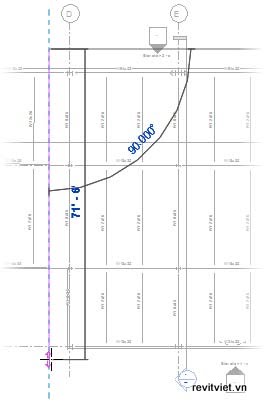
10. Click View tab > Sheet Composition panel > Matchline to add a matchline to the view.
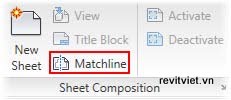
11. In the view window, sketch a vertical line to the left of the grid line D.
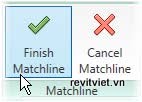
12. Click Create Matchline Sketch tab > Matchline panel > Finish Matchline.
The matchline is now displayed in both the parent and dependent views.
13. Click View tab > Windows panel > Close Hidden.
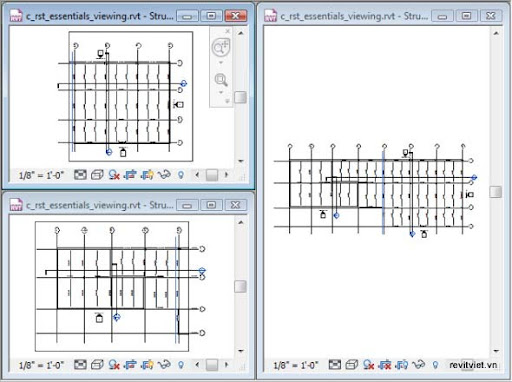
14. Open the following dependent views.
- SECOND FLR. - West
- SECOND FLR. - East
16. Zoom all the views to fit in their windows.
Note: The completed exercise illustration may differ depending on the view that is first opened.
17. Close the file without saving changes.
The work of a master.
ReplyDelete